
This post helps Magic players design and print proxies that look clean, shuffle consistently, and stay readable in real games by explaining the key design + print prep decisions, so they can avoid the classic “why does my deck feel cursed?” outcome.
TLDR
Decide your goal first: quick playtest, a full Commander deck, or a cube you’ll draft for years. Your “right” print setup changes with that answer.
Nail the three zones: trim (final size), bleed (extra art past the cut), safe area (keep text away from edges). Most proxy disasters are just one of these missing.
Pixels matter more than “DPI” settings: if your art is low-res, your rules text will rat you out immediately.
Color and finish are gameplay choices: glare, fingerprints, and “sticky shuffling” are real. Pick accordingly.
Always do a tiny test print before you commit to 200 cards and a weekend of regret.
You can make gorgeous proxies. You can also make 99 slightly-too-small rectangles that feel like they were cut by a haunted guillotine. Let’s aim for the first one.
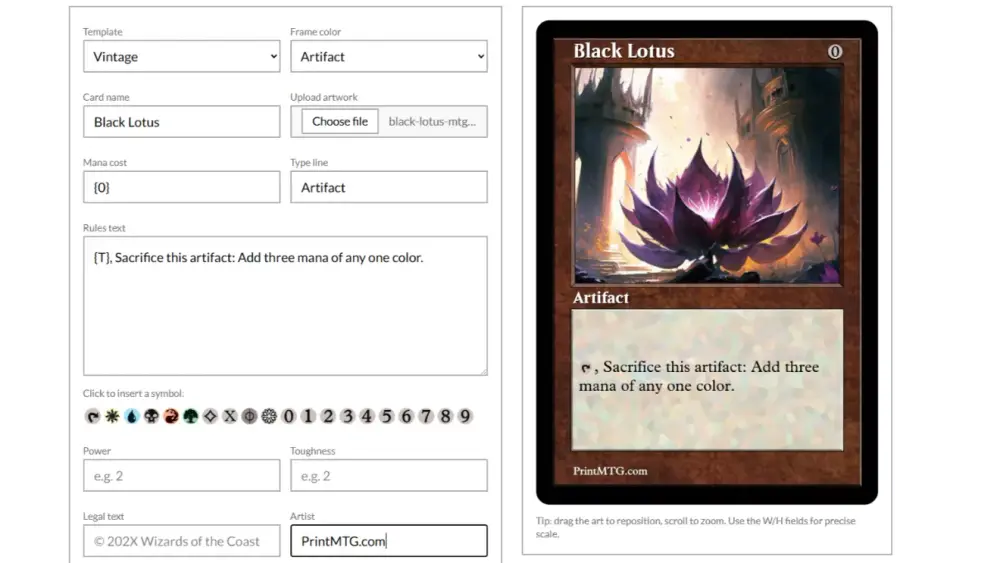
If you’re printing MTG proxies, the “design” part is not just picking art you like. It’s designing something that reads cleanly across the table, trims cleanly, and doesn’t turn every shuffle into a minor negotiation.
Step 1: Decide what “good proxies” means for you
Before you touch Photoshop or a decklist upload, answer this:
What are you trying to optimize for?
Speed (playtesting): “I need this deck in sleeves tonight.”
Consistency (Commander nights): “I want the deck to shuffle like a deck, not like a stack of mixed paper weights.”
Repeatability (cube): “I’m going to draft this 20+ times. If one card feels off, I will notice forever.”
A quick way to pick your path:
If your proxies are temporary, prioritize readability + correct sizing.
If your proxies are permanent, prioritize stock, finish, and cut consistency.
If your proxies are for a cube, prioritize batch consistency above everything. Cube players are kind, patient people who will also absolutely notice that one card is 1mm taller.
Step 2: Design for gameplay first, aesthetics second
Your proxy can be full-art, alt-frame, metal album cover themed, whatever. But the card still needs to behave like a Magic card.
Here’s the playability hierarchy that matters:
Card name (fast identification)
Mana cost (casting reality check)
Type line (what rules bucket is this in)
Rules text (the part everyone argues about)
P/T or loyalty (combat math, planeswalker math)
Art (yes, it matters, but it’s not allowed to sabotage the text)
Readability rules that save games
Don’t let art invade the text box unless you’re intentionally building “guess that card.”
Use strong contrast for rules text. Light text on busy art looks cool right up until someone squints and misses “may.”
Make the smallest text readable at arm’s length. Your printer can’t fix a font choice that was born to suffer.
Avoid hairline borders unless you enjoy discovering what cutting tolerance means in real life.
If you want a deep, practical rundown on the “why do white edges happen?” problem (and how to stop it), this guide is the antidote:
Make it obviously a proxy (and avoid table confusion)
This isn’t about being preachy. It’s about avoiding mix-ups and awkward moments.
Easy options:
Use a custom card back (cleanest).
Add a small “PROXY” or set icon swap that makes it unambiguous.
Keep your proxy style consistent within a deck so you don’t create accidental marked-card vibes.
Step 3: Printing MTG proxies means understanding trim, bleed, and safe area
This is the part where design stops being feelings and becomes geometry.
The three zones (memorize this once)
Trim size: the final cut size of the card.
Bleed: extra image extending past trim so minor cut drift doesn’t reveal white edges.
Safe area: a margin inside the trim where important text/icons should live so they don’t get clipped.
If you only remember one thing: cuts drift. They always drift. The universe demands it.
A practical “don’t mess this up” checklist
Backgrounds extend past trim into the bleed area (all the way).
Rules text stays inside the safe area (not flirting with the edge).
Your export size matches your intended print size (no surprise scaling).
Step 4: Resolution and image quality (the “text is a snitch” section)
The fastest way to make proxies look bad is to start with low-res art and then act shocked when it prints like a screenshot from 2009.
Two truths:
Changing the DPI number doesn’t magically add detail.
Small text exposes everything. Art can hide softness. Rules text cannot.
A solid baseline for print work is 300 PPI at final size, but what matters is the actual pixel dimensions of your file.
If you want a no-nonsense breakdown (with numbers, not vibes), this one is worth your time:
Good / Better / Best framework for proxy images
Good: Start with a better source image
Highest-res download you can get, not a cropped preview.
Better: Traditional upscaling (when the art is already clean)
Works well for crisp digital art, tends to stay honest.
Best: AI super-resolution (when you’re stuck)
Can look great, can also invent tiny nonsense details. Inspect closely, especially around text and borders.
Step 5: Color management (AKA “why is it darker than my monitor?”)
Screens lie. Paper also lies. They just lie differently.
Basic reality:
Commercial printing is typically a CMYK world.
Most design work starts in RGB because screens are RGB.
What you should do depends on your workflow:
If you’re printing at home on a desktop printer, RGB can be fine because many drivers handle conversion internally.
If you’re prepping files for a print workflow, it’s smart to preview or convert intentionally so you’re not surprised by dull reds or crushed shadows.
Practical tips:
Avoid ultra-neon colors that only exist on backlit screens.
Watch dark areas (they can turn into “mud with aspirations”).
Test print one card with heavy blacks and fine text before committing.
Step 6: Picking a printing method (with real tradeoffs)
Here’s the honest menu. No judgement. Just consequences.
MethodBest forWhat you give upPaper print + sleeve over a bulk cardFast playtestingDurability, consistent shuffle feelHome print on heavier stock + cutMedium-term decksTime, cutting consistency, double-sided alignment painProfessional print + finish + precision cutDecks, cubes, anything you’ll reuseSlightly higher cost, but you stop doing print-shop chores
If your goal is a cube or a “real deck” experience, consistency is the whole game: consistent stock, consistent finish, consistent cut. That’s why PrintMTG leans hard on premium stock, a UV-coated finish, and precision cutting so your deck doesn’t end up with one card that shuffles like a rogue bookmark.
Step 7: Finishing details that matter more than you think
Cutting and corner rounding
Even clean prints feel bad if the cut is inconsistent.
Rounded corners matter because sharp corners catch sleeves and feel wrong in-hand.
Finish and shuffle feel
Finish isn’t just “matte vs gloss aesthetics.” It changes:
glare under lights
fingerprint visibility
friction inside sleeves
scuff resistance over time
A matte-satin style finish is popular for play because it reduces glare and tends to feel smoother in motion. Gloss can look punchier, but it can also reflect overhead lights like it’s trying to signal aircraft.
Step 8: The 5-minute test print that saves your weekend
Before you print a whole deck (or a cube), print 2–3 test cards and check:
Size in a sleeve next to a real card (does it feel taller/wider?)
Rules text readability from table distance
Color balance (especially blacks and skin tones)
Edge behavior after cutting (are you seeing white slivers?)
Front/back alignment if you’re doing double-sided at home
This is the part where you catch problems while they are still cheap.
Quick troubleshooting: symptom → cause → fix
White edges after cutting → no bleed or scaling not at 100% → add bleed, print at actual size, cut consistently
Blurry text → low-res source → get a better source or upscale carefully
Colors too dark / muddy → RGB-to-print shift, crushed shadows → adjust levels, test print, avoid ultra-dark backgrounds
Backs misaligned → duplex drift (home printers love this) → print fewer per page, use guides, test on the exact paper you’ll use
Deck feels “sticky” in sleeves → sleeve friction or finish mismatch → swap sleeves, clean sleeves/mat, consider a different finish
Wrap-up
Designing and printing MTG proxies is mostly about removing failure points: sizing, bleed, resolution, and cut consistency. If you get those right, the rest becomes preference and style.
And if you want the “I just want this deck to exist in real life” path, PrintMTG’s workflow is built for that: list in, versions chosen, proxies out. No glue sticks. No paper trimmer therapy.
FAQs
What size should MTG proxy cards be?
Standard Magic cards are approximately 2.5" × 3.5". Design to that trim size, then add bleed.
How much bleed should I use when printing MTG proxies?
A common print standard is 1/8" (0.125") bleed on each side. That gives cutting tolerance room so you don’t get white edges.
What resolution do I need for good-looking MTG proxies?
A solid baseline is 300 PPI at final size, but the real key is having enough pixels so text and symbols stay crisp.
Should I design in RGB or CMYK?
For most design work, RGB is fine while editing, then preview or convert intentionally depending on your print workflow. Home printers often handle conversion internally, but commercial print workflows commonly expect CMYK-aware files.
Matte or gloss for proxies?
Matte (or matte-satin) tends to reduce glare and hide fingerprints better. Gloss can pop more but can reflect overhead lighting and feel slicker in sleeves.